DIY Tawashi Sponges
September 29, 2017

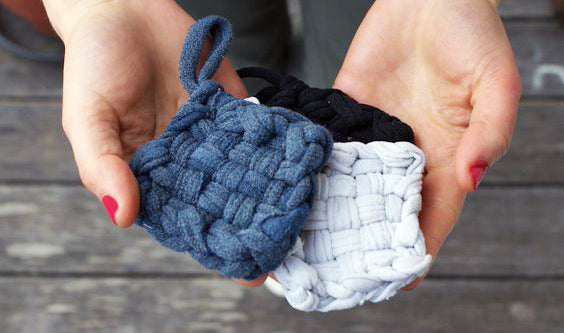
At ZoLi, we love reducing, recycling, and most of all reusing! We found a fun way to reuse t-shirts, pants, and just about anything else that your or your littles inevitably grow out of - Making your own tawashi sponges!
These sponges are a great way to replace your typical polyurethane sponge. Most often, these sponges are made by crocheting or knitting yarn, but this version involves a DIY loom and t-shirts or pants that have seen better days.
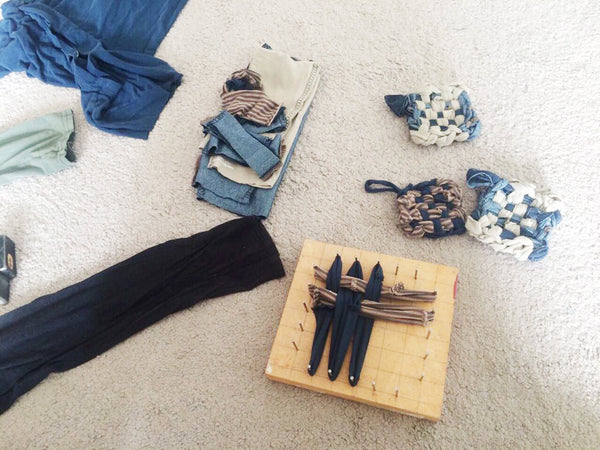
What you'll need:
- A square piece of wood approximately 5.5 by 5.5 inches. No need to worry about cutting a piece to size!
- 20 nails
- Ruler
- Hammer
- Scissors
- Old shirts (short or long) and/or pants
- Preferably children's clothing - these are the perfect size!
What to do:
- You'll want to start off by making the loom - we drew a 5.5 x 5.5 in square on the wood, then hammered in nails about 1 3/4 inches apart along this line (5 nails per side.
- Cut up your shirt sleeves or legs of pants. We recommend making each cut about 0.3 inches in width. Cut until you have 10 cloth circles.
- Attach 5 pieces of fabric in one direction on your loom board. Then, attach 5 more pieces going the opposite direction, weaving the pieces in and out of the first circles as you go.
- Once all the pieces are there, you'll want to close off the ends. Take one end off the loop and slip it through the next loop. Do this until all ends are closed.
- Get creative! Make your sponge unique by mixing patterns and colors for a colorful and fun tawashi!
Leave a comment
Comments will be approved before showing up.